 Save
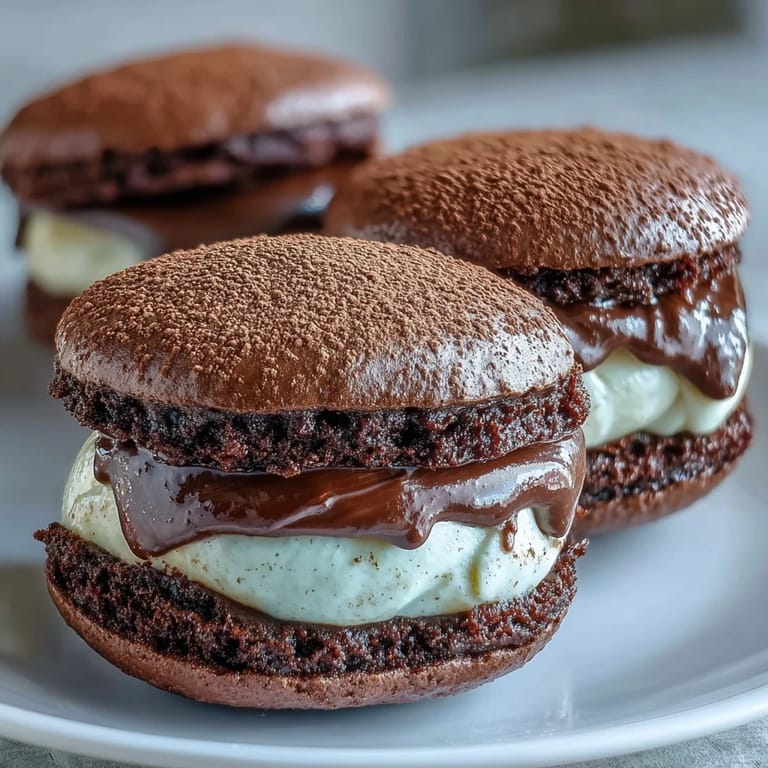
Save My grandmother used to make tiramisu for every holiday, and I'd watch her layer those delicate ladyfingers with such care, as if she was building something sacred. Years later, standing in my kitchen on a rainy afternoon, I wondered what would happen if I captured that same coffee-and-chocolate magic in something you could hold in your hand. These whoopie pies were born from that daydream—soft chocolate cakes embracing a silky coffee mascarpone filling that tastes like elegance made simple. The first bite brought back every good memory of her kitchen, but with this playful, unexpected twist.
I brought a batch to my book club on a Tuesday night, and everyone went quiet for a moment after the first bite—that rare, wonderful silence that only happens when food says something words can't. One friend asked if I'd opened a bakery when I wasn't looking, and another immediately started planning to make them for her daughter's graduation party. That's when I knew these whoopie pies had transcended being just a dessert; they'd become a small, edible conversation.
Ingredients
- All-purpose flour (1 2/3 cups): This is your base, and measuring by weight makes all the difference—it prevents dense cakes that nobody wants.
- Unsweetened cocoa powder (2/3 cup): Don't skip the sifting step when combining with flour; clumps will sabotage your texture.
- Baking powder and baking soda (1 1/2 teaspoons and 1/2 teaspoon): The chemistry here matters—baking soda reacts with the cocoa's acidity to lift the cakes just right.
- Salt (1/4 teaspoon): A pinch that sounds small but rounds out the chocolate flavor beautifully.
- Unsalted butter (1/2 cup), softened: Cold butter won't cream properly, so take it out 30 minutes before you start.
- Granulated sugar (1 cup): You're looking for light and fluffy here, which takes about 3 minutes of beating.
- Large egg and vanilla extract: These bring structure and warmth to the cakes.
- Whole milk (1 cup): The liquid that keeps these cakes tender rather than cakey in the way you don't want.
- Mascarpone cheese (8 oz), chilled: This is non-negotiable—it must be cold or the filling breaks when you beat it.
- Heavy cream (1/2 cup), cold: Whipped together with mascarpone, it creates cloud-like texture.
- Powdered sugar (1/2 cup), sifted: Sifting prevents grainy filling—worth the extra minute.
- Instant espresso powder (1 tablespoon): Dissolve it in hot water first so it distributes evenly throughout the filling.
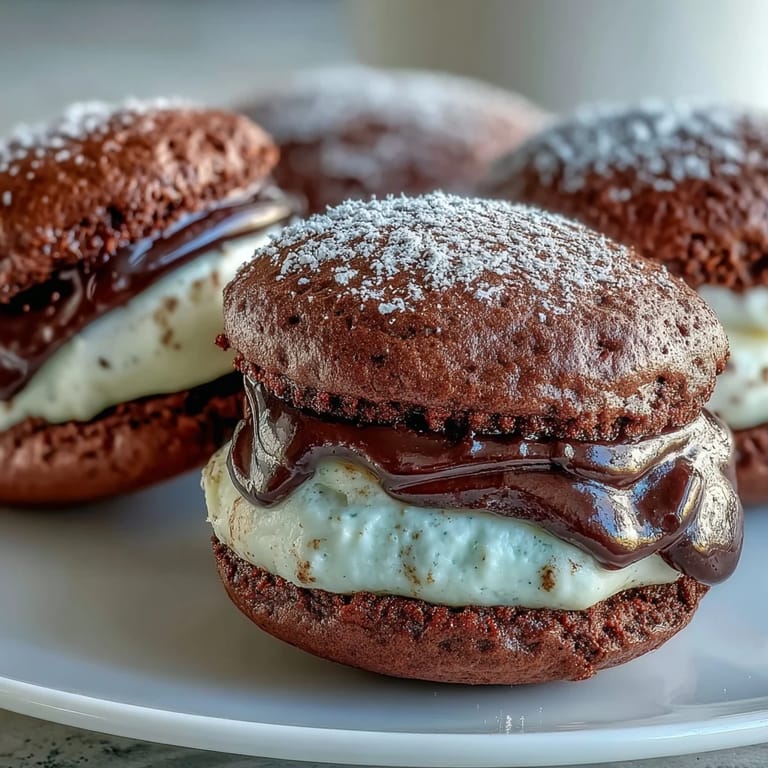
- Unsweetened cocoa powder for dusting: The final flourish that says you know what you're doing.
Tired of Takeout? 🥡
Get 10 meals you can make faster than delivery arrives. Seriously.
One email. No spam. Unsubscribe anytime.
Instructions
- Heat your oven and prep your pans:
- Set the oven to 350°F (175°C) and line two baking sheets with parchment paper—this prevents sticking and makes cleanup almost painless. You'll thank yourself when you're not scraping chocolate cakes off the pan.
- Combine your dry ingredients:
- Whisk together flour, cocoa powder, baking powder, baking soda, and salt in a medium bowl until everything is evenly distributed. This step prevents lumps in your batter.
- Cream the butter and sugar:
- Beat softened butter and sugar together for about 3 minutes until the mixture looks pale and fluffy, like mousse. This incorporates air that makes your cakes tender.
- Add the egg and vanilla:
- Beat the egg and vanilla into the creamed mixture, scraping the bowl once to ensure everything is combined.
- Alternate dry and wet ingredients:
- Add the dry mixture in three parts, alternating with milk in two parts, starting and ending with dry ingredients—this method keeps the batter from becoming dense. Stir just until combined; overmixing develops gluten and toughens the cakes.
- Scoop and bake:
- Using a medium cookie scoop or tablespoon, drop 24 mounds onto the parchment, spacing them 2 inches apart. Bake for 10-12 minutes until the tops spring back when lightly touched—a toothpick should come out clean.
- Cool with patience:
- Let the cakes sit on the pan for 5 minutes so they set, then transfer to a wire rack to cool completely. Warm cakes will crumble when you try to sandwich them.
- Prepare the espresso filling:
- Dissolve the espresso powder in hot water and let it cool to room temperature so it doesn't melt the mascarpone. This small step prevents a broken, grainy filling.
- Beat the mascarpone cream:
- In a clean bowl, beat the chilled mascarpone, heavy cream, and powdered sugar until smooth and thick—this takes about 2 minutes on medium speed. The key is stopping before it looks grainy; overbeating breaks the mascarpone's structure.
- Fold in the espresso:
- Gently beat in the cooled espresso and vanilla until just combined, then chill the filling for 20 minutes if it looks too soft to hold its shape.
- Assemble your sandwiches:
- Spread or pipe a generous dollop of filling onto the flat side of half the cookies, then top with the remaining cookies to create sandwiches. If you're piping, use a medium round tip for the best presentation.
- Final dusting and chill:
- Dust the tops with cocoa powder just before serving—or up to 30 minutes before if you're prepping ahead. Refrigerate for at least 30 minutes before eating so the flavors meld and the texture sets perfectly.
 Save
Save Last winter, I made these for my neighbor who'd just lost her husband, and she called me three days later to say they reminded her of the fancy desserts he used to bring home on Friday nights. That small thing—a whoopie pie dusted with cocoa—became a thread connecting her to a good memory when she needed it most. Food has that quiet power if you let it.
Why These Aren't Just Ordinary Cookies
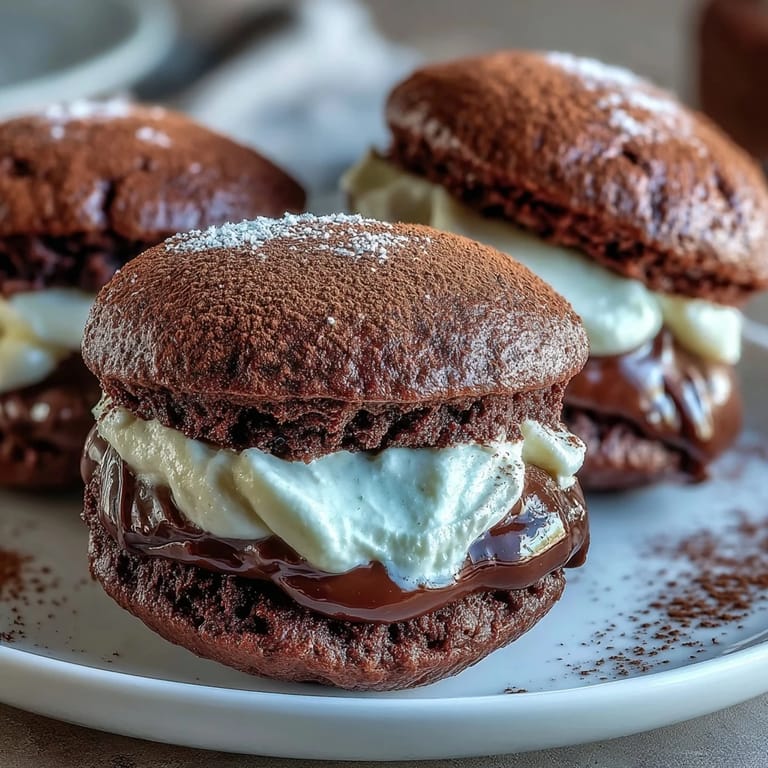
Whoopie pies sit in this magical space between a cake and a cookie, which is probably why people find them so charming. They're substantial enough to feel like real dessert but small enough to eat without ceremony. When you bite into one, there's that gentle give of the chocolate cake, then the creamy resistance of the mascarpone filling—it's textural storytelling on a plate.
The Tiramisu Connection
Tiramisu means 'pick me up' in Italian, and that's exactly what these whoopie pies do—the coffee in the filling gives you a subtle lift while the chocolate grounds you. You get all the elegance of tiramisu without needing to plan hours ahead or worry about raw eggs, and honestly, some people find them easier to eat at a dessert table when you're standing up talking to someone.
Storage and Serving Wisdom
These whoopie pies actually taste better the next day once the flavors have melded together in the refrigerator—a rare quality in baked goods. Store them in an airtight container for up to 2 days, and they'll keep their texture and flavor beautifully. If you want to get creative, try adding a tablespoon of coffee liqueur to the filling for an adults-only version, or swap the mascarpone for cream cheese if that's what you have on hand, though the flavor will shift slightly toward tanginess.
- A boozy twist: Coffee liqueur in the filling transforms these into an after-dinner dessert that adults will remember.
- Make-ahead strategy: Bake the cakes a day ahead, then assemble and fill them the morning of serving so they're at their best.
- Last-minute thought: If your filling is too soft when you're ready to assemble, chill it for another 10 minutes rather than rush it.
 Save
Save These tiramisu whoopie pies have become my answer to 'I need to bring something special but I don't have all day.' They're proof that you don't need complexity to make something people will remember. Every time someone bites into one, I see that quiet moment of joy, and that's really all the recipe ever needed to be.
Recipe FAQ
- → Can I make the whoopie pies ahead of time?
Yes, you can bake the cookies up to 1 day in advance and store them in an airtight container at room temperature. Prepare the filling and assemble the whoopie pies a few hours before serving for the best texture and freshness.
- → What can I substitute for mascarpone cheese?
Cream cheese can be used as a substitute, though the flavor and texture will be slightly different. For a closer match, blend equal parts cream cheese and heavy whipping cream until smooth before adding the other filling ingredients.
- → How do I prevent the cookies from spreading too much?
Make sure your butter is softened but not melted, and don't skip the chilling step if the batter seems too soft. Space the cookie mounds at least 2 inches apart on the baking sheet to allow for natural spreading during baking.
- → Can I freeze tiramisu whoopie pies?
Yes, unfilled cookies freeze well for up to 2 months wrapped tightly in plastic wrap and stored in a freezer bag. The assembled whoopie pies can also be frozen, but the filling texture may change slightly upon thawing.
- → Why is my mascarpone filling too runny?
Overbeating can cause the mascarpone to become thin and runny. Beat only until the ingredients are combined and the mixture is thick and smooth. If it's still too soft, refrigerate the filling for 20-30 minutes before assembling.
- → How should I store leftover whoopie pies?
Store assembled whoopie pies in an airtight container in the refrigerator for up to 2 days. The mascarpone filling is perishable and requires refrigeration. Bring them to room temperature for 15 minutes before serving for the best flavor.