 Save
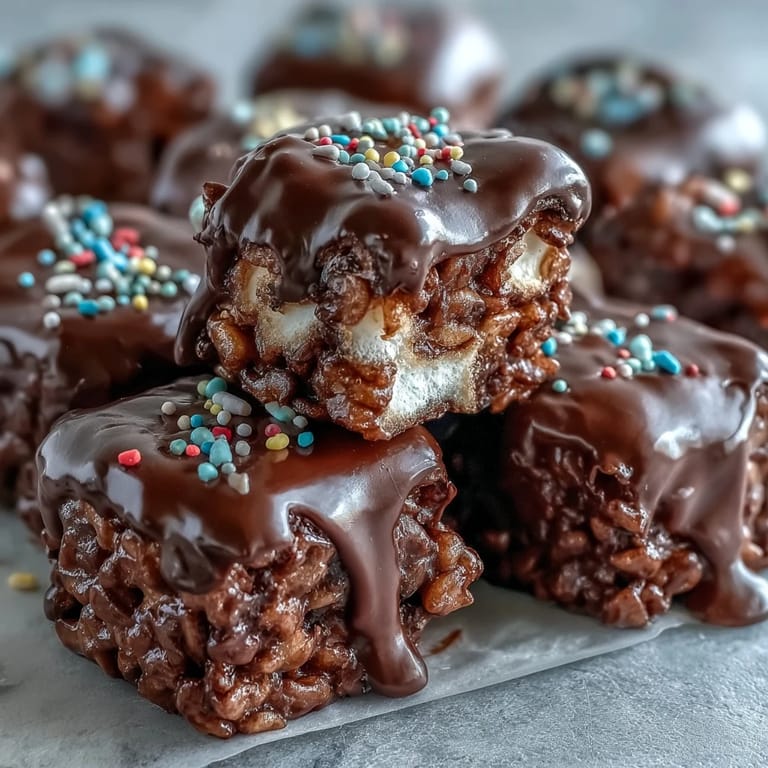
Save The smell of melting marshmallows takes me back to my first apartment kitchen where I made Rice Krispy treats on a Tuesday night just because adulting felt overwhelming that week. These chocolate covered versions became my go to comfort food during exam season in college. My roommate and I would hover over the stove watching the marshmallows transform into that glossy white pool of magic. Something about stirring that sticky mess makes everything feel manageable again.
Last summer I brought these to a neighborhood block party and watched them disappear within fifteen minutes. Three different neighbors asked for the recipe including the typically quiet family across the street. Now whenever I spot rainbow sprinkles at the grocery store I grab a bottle knowing someone will probably need cheering up soon.
Ingredients
- Unsalted butter: Use extra for greasing your hands and pan to prevent the sticky mess that usually happens when pressing cereal mixture
- Mini marshmallows: These melt faster and more evenly than full sized ones preventing those stubborn unmelted lumps
- Rice Krispies cereal: Fresh boxes stay crispy longer so check the expiration date especially if it has been sitting in your pantry
- Fine sea salt: Even a tiny pinch cuts through the sweetness and makes the chocolate flavor sing
- Semisweet chocolate chips: Dark chocolate works beautifully too if you prefer a less sweet topping
- Vegetable oil: This secret ingredient makes the chocolate layer glossy and helps it set without seizing
- Rainbow sprinkles: Add these immediately after pouring the chocolate or they will not stick properly
Tired of Takeout? 🥡
Get 10 meals you can make faster than delivery arrives. Seriously.
One email. No spam. Unsubscribe anytime.
Instructions
- Prep your pan like a pro:
- Butter your 8x8 or 9x9 inch square baking pan thoroughly including the corners. Line with parchment paper leaving overhang on two sides for easy removal later. This step saves you from digging treats out with a spoon.
- Melt butter gently:
- Place 6 tablespoons unsalted butter in a large saucepan over low heat. Stir constantly until completely melted. Do not let it brown or bubble. This low and slow approach keeps the marshmallows from getting tough.
- Create the marshmallow base:
- Add the entire package of mini marshmallows to the melted butter. Keep stirring over low heat until the marshmallows have completely dissolved into a smooth glossy mixture. This takes about 3 to 5 minutes of patient stirring.
- Season if desired:
- Remove the pan from heat and stir in ¼ teaspoon fine sea salt. This tiny amount enhances all the flavors without making these taste salty. The salt is optional but highly recommended for balancing sweetness.
- Combine with cereal:
- Pour in 6 cups Rice Krispies cereal. Use a spatula to gently fold and press the cereal into the marshmallow mixture until every piece is evenly coated. Work quickly since the mixture gets harder to handle as it cools.
- Press into the pan:
- Transfer the mixture to your prepared buttered pan. Use a buttered spatula or buttered hands to press the mixture firmly and evenly into the pan. Press harder than you think you should to prevent crumbly bars later.
- Let cool briefly:
- Set the pan aside at room temperature for about 10 minutes. The cereal layer should feel set to the touch but not fully hardened. A slight warmth is perfect for helping the chocolate adhere.
- Melt the chocolate:
- Combine 1 ½ cups chocolate chips with 1 teaspoon vegetable oil in a microwave safe bowl. Microwave on medium power for 30 seconds then stir. Repeat in 30 second intervals stirring after each until completely smooth and glossy.
- Add the chocolate layer:
- Pour the melted chocolate over the cooled cereal base. Use an offset spatula or the back of a spoon to spread it evenly covering the entire surface. Work quickly before the chocolate starts to set.
- Sprinkle while wet:
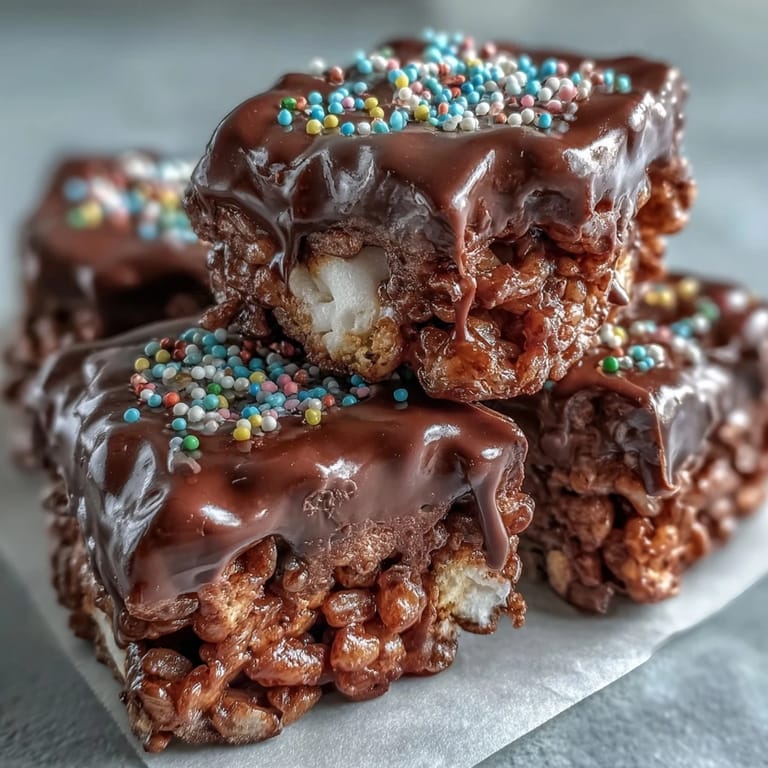
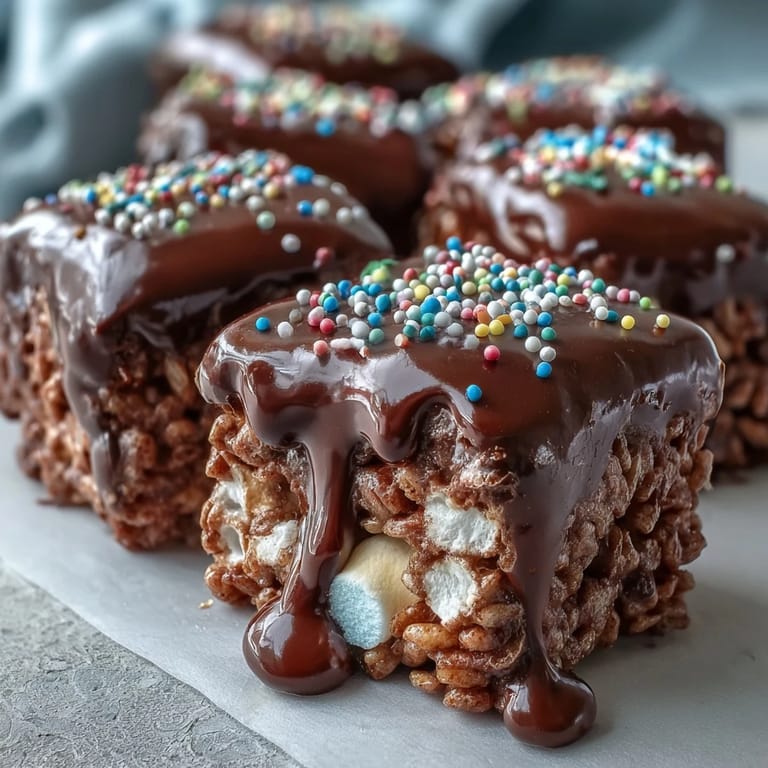
- Immediately scatter 2 tablespoons rainbow sprinkles or chopped nuts over the chocolate if using. Press them lightly with your fingers to ensure they stick. This is the moment for any festive toppings you want to add.
- Let everything set:
- Allow the treats to sit at room temperature for at least 1 hour. For faster results refrigerate for 20 to 30 minutes until the chocolate feels firm when touched gently. Do not freeze or the chocolate may bloom.
- Cut into bars:
- Lift the entire block from the pan using the parchment overhang. Place on a cutting board and use a sharp knife to cut into 12 to 16 squares. Wipe the knife with a damp cloth between cuts for clean edges.
 Save
Save My daughter requested these for her eighth birthday instead of a traditional cake. Watching her tiny hands press the sprinkles into the chocolate while chatting about school made me realize recipes become special because of the moments we create around them.
Make Ahead Magic
You can prepare the cereal base up to two days in advance. Wrap the uncut slab tightly in plastic and store at room temperature. Add the chocolate coating and sprinkles the day you plan to serve them for the freshest texture and best appearance.
Flavor Variations
Swapping white chocolate for the semisweet creates an elegant look especially when topped with pastel sprinkles for baby showers or spring events. For holiday versions try adding ½ teaspoon peppermint extract to the melted chocolate and use crushed candy canes instead of sprinkles.
Serving Suggestions
These bars transport beautifully when placed between layers of parchment paper in a rigid container. The chocolate stays intact and the sprinkles remain perfectly positioned.
- Cut these into small squares for dessert buffets or large rectangles for a grab and go treat
- Stack individual bars in clear treat bags tied with ribbon for party favors or bake sale items
- Wrap bars in plastic wrap then foil and freeze for up to six months for emergency sweet cravings
 Save
Save Hope these chocolate covered treats become your new favorite reason to linger in the kitchen making memories one sticky spatula at a time.
Recipe FAQ
- → How do I prevent my marshmallow mixture from becoming too sticky?
Ensure you're stirring constantly over low heat when melting the butter and marshmallows to prevent browning and keep the mixture smooth. Lightly buttering your spatula or hands when pressing the mixture into the pan also helps immensely.
- → Can I use different types of chocolate for the topping?
Absolutely! While semisweet or dark chocolate chips are suggested, you can experiment with milk chocolate, white chocolate, or even a blend. Adjust the oil quantity slightly if needed to achieve the desired glossy consistency for spreading.
- → What's the best way to store these bars?
Store them in an airtight container at room temperature for up to 3 days to maintain their texture. If you need to keep them longer, they can be refrigerated for up to a week, but let them come to room temperature for the best eating experience.
- → How can I customize these for different occasions?
The possibilities are endless! You can vary the sprinkles for holidays, add a touch of vanilla extract to the marshmallow base for extra flavor, or even mix in chopped nuts or mini candies to the cereal mixture before pressing.
- → Why did my chocolate topping crack when I cut the bars?
Cracking often happens if the chocolate layer is too thick or if it's too cold. Allow the bars to set at room temperature for about an hour, or if refrigerating, don't overchill. Using a sharp, warm knife can also help achieve cleaner cuts.